I have a lot of friends who got DSLR cameras for Christmas and are wanting to know the ins and outs about how to use them, so I thought I would just write a quick post about the basics! Obviously, there is SOOOOO much to learn–way more than I can write in one little blog post–but I am a firm believer in shooting in manual, and in order to do that there are a few things you need to know.
First of all, why is it so important to shoot in manual? Auto-mode will just do all the work for you, right? Right! Why do you want your camera to do all the work?? You’re smarter than your equipment! There is no point in spending hundreds of dollars on camera equipment if you aren’t going to use it to it’s full potential! In my opinion, right when your camera comes out of the box, it should be in manual mode. It’s scary at first, and there are so many dials and buttons on the back of your camera, and you feel like you’ll never get it figured out, but with time and practice you won’t even have to look at the buttons and dials. Your fingers will just know what to do! AND your photos will be infinitely better, I promise.
Ok, the most important thing you need to know about photography–LIGHT! Light is everything! Once you know how to make light work for you, everything else will just fall into place. It’s a difficult thing to master (I sure haven’t mastered it yet), but there is a simple place to start: the exposure triangle. The exposure triangle consits of three elements: ISO, aperture, and shutter speed. I am going to go over what each one means, and then I will talk about how to apply them and make them work together!
ISO
ISO is the hardest concept for me to get because it’s more abstract than the other two. So, here’s how it was explained to me that made the most sense. ISO refers to how sensitive your cameras sensor is to light. Back in the days when there was no such thing as digital photography, they used to make different types of film with different sensitivities to light. So in order to get different ISO settings with a film camera, you would have to buy different strips of film. Your digital camera has a sensor in it that becomes more or less sensitive to light as you change your ISO setting. The higher your setting, the more sensitive to light. You have to be careful, though because the higher you raise your ISO, the more grainy your photos will look. Grain isn’t always a bad thing, but it makes the photos look less sharp. It’s kind of a difficult concept, but when you combine it with the other two parts of the exposure triangle, it makes more sense.
Aperture
Aperture refers to the widening and closing of the blades inside your lens to let the light in to the sensor. It is also referred to as the “f-stop.” The lower the f-stop, the wider the blades open, letting in more light. The higher the number the smaller the blades close, letting in less light. So, if you have a 50mm f/1.8 lens, 1.8 is the widest it can go, and when you have your aperature set at 1.8, you are letting in the most light. You have to be careful with aperature, though, because the wider your aperature (lower number) the smaller your depth of field. That means, when you are shooting wide open, it can be hard to get your subject in focus. It takes A LOT of practice to get sharp photos while shooting at a 1.8 or lower. If you are shooting a family or even just two people who aren’t in the same focal plane (one standing in front of the other) it’s usually not a good idea to shoot with a wide open aperture because someone is going to be out of focus. The nice thing about having a lens with the capability to open up wide is you can get that dreamy bokeh (blur) in the backgroung of your photos. The smaller your depth of field (low aperature) and the further your subject is from the background the more bokeh you will get.
Shutter Speed
Shutter speed is the most basic concept of the three. It’s pretty self explanitory. Shutter speed refers to how fast or slow your shutter is opening and closing to let in light. As a general rule, I don’t like my shutter speed to be any slower than 1/150th of a second when I’m photographing people and hand holding my camera. The longer your shutter stays open, the greater the chances are of taking a blurry photo due to subject movement or camera shake. I do NOT have a steady hand (good thing I’m not a surgeon!) so a the faster the shutter speed, the better for me!
Alright, let’s do some real-life applications so you can see how these three concepts work together.
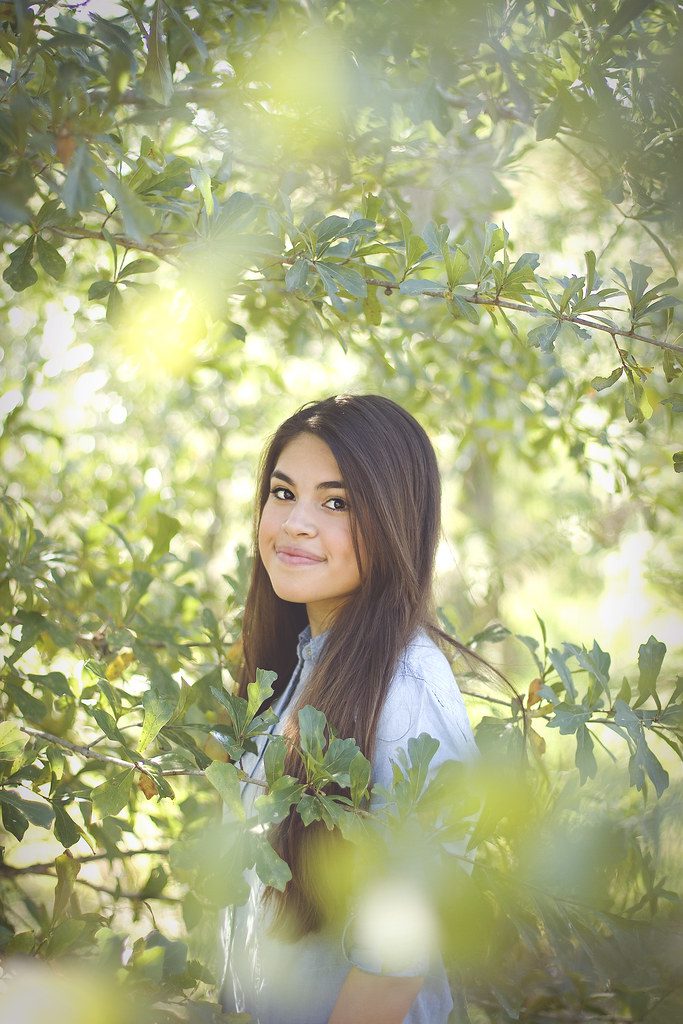
My settings for this photo were ISO 125 f/1.8 SS 1/200 and I was using my 50mm f/1.4 lens.
This photo was taken on a bright, sunny day in the afternoon. My subject was standing in some trees. The light was coming from the left corner of the photo. I like to keep my ISO low if I am shooting in good lighting. I am not a fan of too much noise in my photos unless I am using the grain for artistic purposes. I wanted to get some cool bokeh behind my subject AND in front of her, since I was shooting through leaves so I had my aperature set at a low number. Since it was so bright outside and I was shooting wide open, I was able to keep my shutter speed pretty fast. These settings are pretty typical for me on a shoot where I only have 1 subject. I usually don’t close my aperature any smaller than 2-2.5 because I am obsessed with bokeh, and I try to choose a time of day that I will have plenty of light.
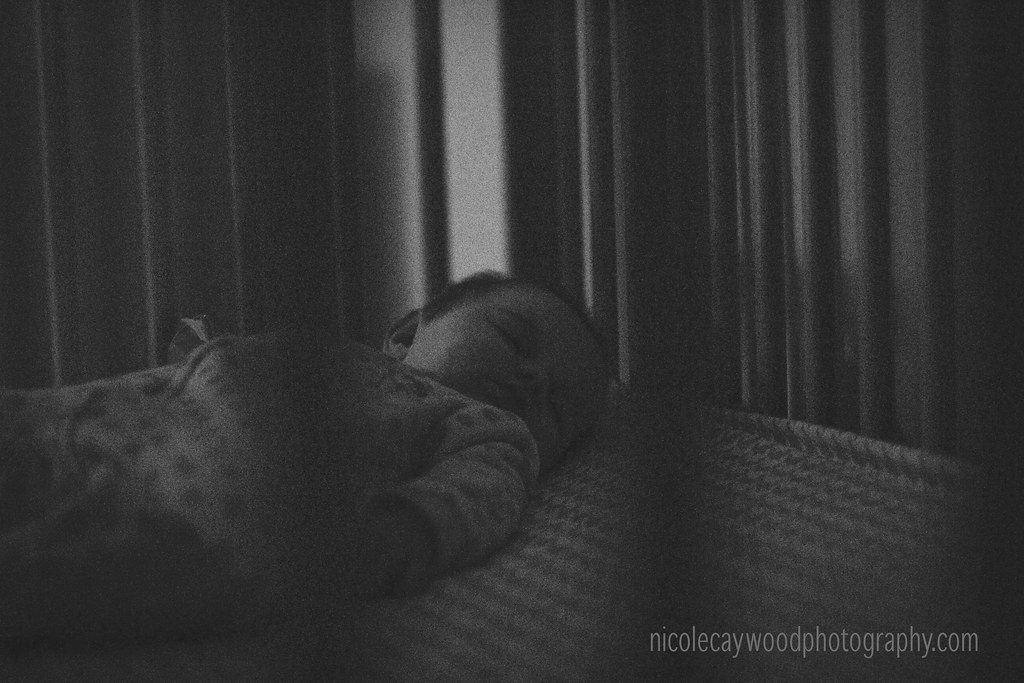
My settings for this photo were ISO 3200 f/1.4 SS 1/100 and I was using my 50mm f/1.4 lens.
I took this photo for a personal project, and I wanted it to be grainy. The room was pretty much pitch black except for the small amount of light coming in from the hallway, so I cranked my ISO setting up to 3200 (that’s what caused all of the noise). I was shooting wide open to let in the most light, and to get the bokeh from shooting through the bars of her crib. My shutter speed was on the slow side, but since the baby was sleeping, and I was sitting in a chair where I could rest my elbows, it was ok.
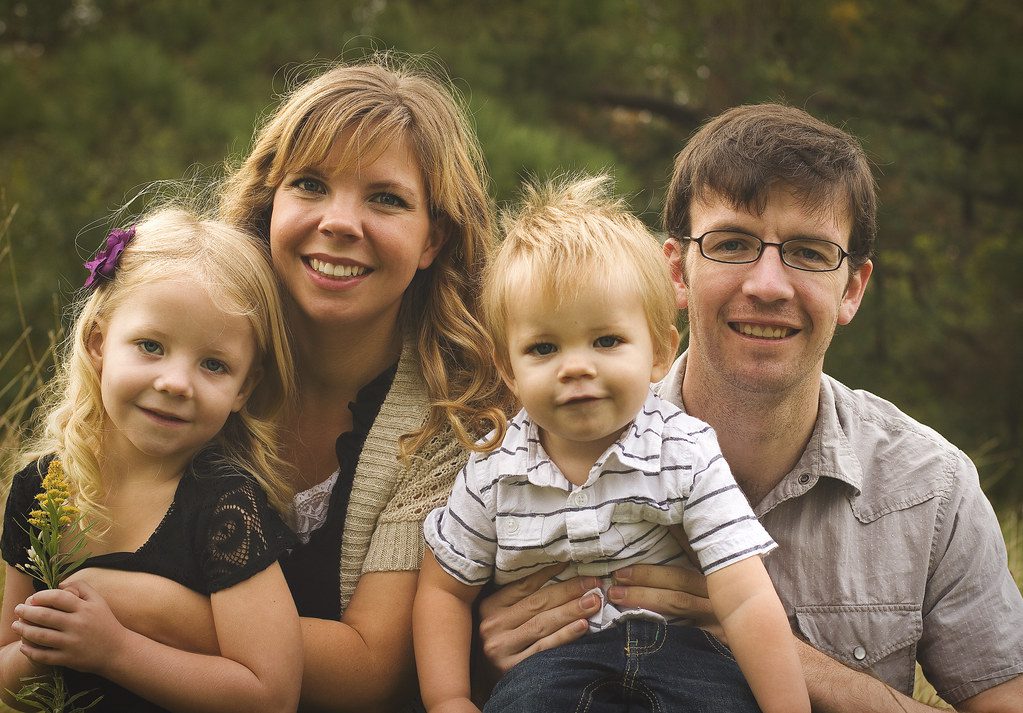
My settings for this photo were ISO 200 f/4.0 SS 1/400 and I was using my 50mm f/1.4 lens (can you tell I like this lens??)
Since this was a group shot, I didn’t want my depth of field to be too shallow so I could get them all in focus, so I set my f-stop at 4. I still wanted bokeh, so I set my subjects far away from the background. Again, it was a pretty sunny morning so I was able to have a low ISO setting and fast shutterspeed even though my aperature wasn’t wide open.
And that’s the exposure triangle! The best way to understand (for me at least) is to go out and try it! So, set your camera to manual and start shooting!
I am planning on doing a blog post in the future about how to get sharp photos. It took me a loooong time to be consistent with this and I hate it when I miss focus! So stay tuned 🙂
*Feel free to leave more questions in the comments! I am DEFINITELY not the most knowledgable source on everything photography, but I feel like I have a good knowledge of the basics of shooting and editing!

